8 – Outlook add-in
Users can install an Outlook add-in to download their LeavePlanner calendar items into Outlook. The LeavePlanner Outlook add-in can be downloaded below, installed and then configured with your login details. See the instructions below to get started.
System Requirements
Operating System – Windows 7/8/10
Microsoft Office – 2010 or later
Microsoft .Net v4 Click here to download .NET
Privileges – Local Administrator

Downloading the installer
LeavePlanner Outlook add-in x86/x64 download: https://help.leaveplanner.com/downloads/LPOutlookSetup.msi
Installing the Outlook add-in
To install the add-in, you’ll need to first download the installer from the link above and follow the steps below.
- Close Outlook
- Open the folder where you downloaded the setup file (LPOutlookSetup.msi).
- Double click the LPOutlookSetup.msi file to launch the installer and follow the steps on-screen.
a. Once open, click the Next button to continue.

b. Agree to the terms of the License Agreement and click Next to continue

c. Choose the installation path, leave default if you aren’t sure.
d. Click Install to confirm you are ready for the installer to start.

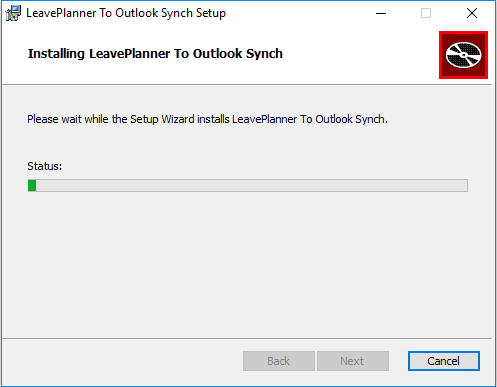
e. Wait for the progress bar to fill as the add-in is installed.
f. Once complete hit the Close button and launch Outlook.
- The LeavePlanner Outlook add-in is now installed and you will find the LeavePlanner group on the menu ribbon.
Using the Outlook add-in
- Open Outlook and go to the LeavePlanner section of the menu ribbon.

- Click on the Setup Account icon to configure the settings.
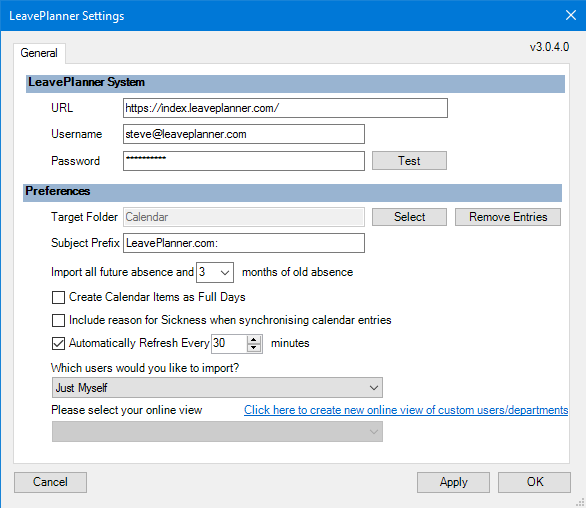
- You will need to fill in the following settings:
- URL: The address in the bar when you log in to LeavePlanner. This will differ if your organisation has the Enterprise edition of LeavePlanner. (Usually https://secure.leaveplanner.com/)
-
Username: This is your LeavePlanner username, the same as you type to log in to LeavePlanner.
-
Password: Enter your LeavePlanner password, if you are unsure of this you can contact your HR team or LeavePlanner administrator.
-
Test: Press this button once you have filled in the settings and it will confirm if your details are correct
- You can then configure the preferences:
- Target folder: Hit the Select button to choose the folder you want to synchronise, this could be a personal folder or public folder (usually Calendar). If you wish to synchronise with a public folder then it is advisable to have the public folder as a favorite folder with local cache enabled to speed up the synchronisation process. Please speak to your email administrator for help with this setting.
- Remove Entries: This button will remove all of the previously downloaded LeavePlanner entries should you wish to clear them from your calendar.
- Subject Prefix: Modify the text in this field to change or remove the prefix from the calendar entries.
- Import…old absence: Select how many months of previous absence you want to import when synchronising.
- Create Calendar Items and Full Days: All LeavePlanner entries will be created as All Day items on the calendar.
- Include reason for Sickness…entries: This will include the reason for any sickness entries that are created. If you do not have the required permissions then this option will have no effect on the entries when they are created in Outlook.
- Automatically Refresh Every..: Specify the time in minutes that you wish to perform a background synchronisation.
- Which users would you like to import?: Select from one of the following options:
- Just Myself : Import only your absence entries.
- The Whole Company : Import everyone’s absence records. If you are not a System Admin then only your absence will be imported.
- Specific Users or Departments : Import everyone that is setup in your online view.
- Please Select Your Online View : If you have selected Specific Users or Departments then this will display your online views allowing you to select one. If you have the correct privileges then all of the users in this view will be imported.
- Once you have set the settings and preferences, hit Apply and OK to continue.
Now that the LeavePlanner add-in is configured, you can hit Synch now to import the LeavePlanner calendar entries.