9 – iCAL Sync
To synchronise your calendar with Outlook, login to your LeavePlanner and navigate to ‘My Settings’ (https://secure.leaveplanner.com/mysettings). From here select the View you want to import into Outlook, for example you could click the Default View.
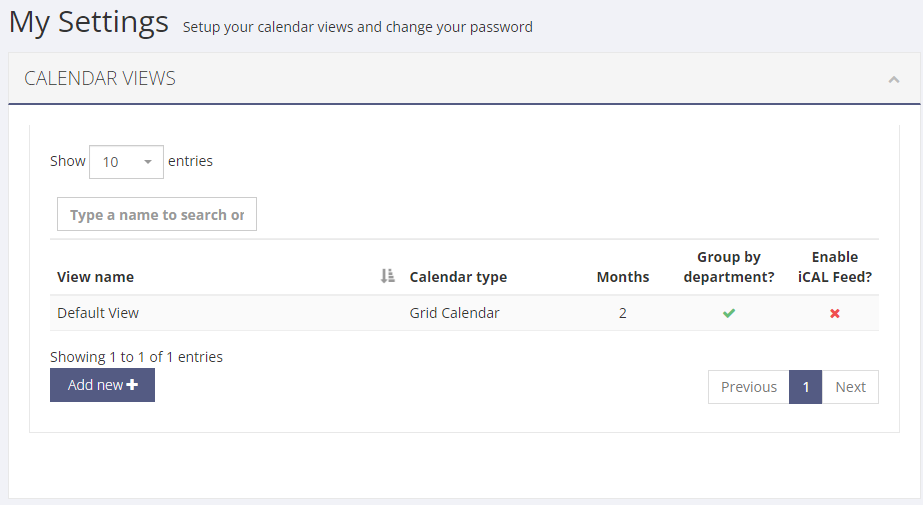
If the iCAL Feed is not already enabled for this view then go ahead and enable it and click Save.

Finally click in the text box and copy the URL which is your personal iCAL Feed URL.
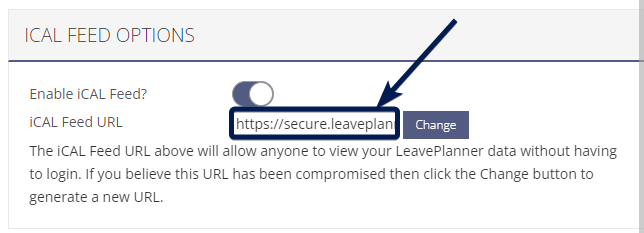
Your iCAL Feed URL should look something like this:
https://secure.leaveplanner.com/ical.ics?cGUID=00000000-0000-0000-0000-000000000000&cID=00000.
Nb. Your iCAL link will not have all 0’s it will be a mixture of letters and numbers. If you get a link that only has 0’s then be sure to click on the ‘Change’ button and save your view again.
Use Outlook on the web to add your Internet calendar with these steps:
- Sign in to Outlook on the web https://outlook.office365.com/owa/
- Switch to the Calendar module.
- Select the Add calendar menu.
- Select the Subscribe from web option.
- Paste the iCAL Feed path to your Internet calendar file and give it an optional calendar name.
- Select Import.
The new Calendar feed will automatically update according to Microsofts schedule which is every 4 hours.