1.1 – View Planner
The View Planner page gives you a calendar display of all leave within your organisation that you are entitled to see. You can use this calendar to check availability of dates for future requests, or even look back at previous leave or absence. There are various options available to you that change what is displayed on the calendar and how it is presented. Take a look at the options below and when you are ready why not take a look at the Creating Calendar views.

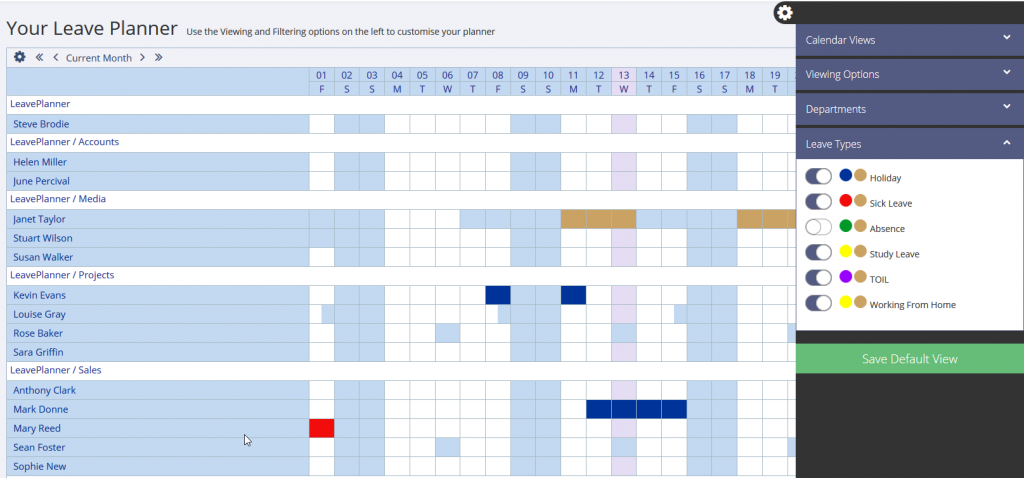
View Planner Options
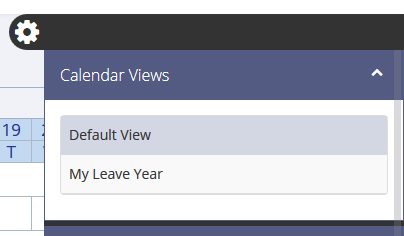
Calendar views
This selector only appears if you have defined you own calendar view, it allows you to switch between the default view and your own customised view. To learn how to create your own calendar views, visit the Creating Calendar Views page.
Viewing options
The Viewing Options area contains settings that control the calendar area on this page. You can modify the following:
- Grid Calendar or Classic Calendar (see below for the differences)
- Date range to display (Choose start date and number of months)
- Details on hover (mouse-over calendar items to reveal detail)
- Group by department (staff are organised into their specified teams)
- Just people on leave (hide employees who do not have any leave in this date range)
- Show weekends (select to highlight weekends, or even working patterns, on the calendar)

Department selector
Use the selectors here to choose which of your departments are shown in the calendar.

Leave types
The Leave Types area lists the types of leave that can be displayed on the calendar. Choose from:
- Holiday
- Sickness
- Absence
- Custom leave (if defined in Leave Settings)
Calendar Types
There are two styles of calendar to choose from, which one is better will depend on what you are viewing. Both calendars are displayed monthly and are customisable with the viewing options and calendar views.
Grid Calendar
The grid calendar shows a separate row of dates per employee. This makes it great for planning leave and avoiding conflicts within your team.
Classic Calendar
The classic calendar is like your conventional wall calendar. The days of the month are displayed once, and multiple items can appear on each day, therefore ideal if you want to find the leave records on a specific day.

Details on Hover
When applied in the Viewing Options, the details on hover setting will give you detail on any item shown in the calendar. To view this detail, hover your mouse cursor over an item and the following will be displayed:
- Employee name
- Requested/Authorised status and Leave Type
- Date and time period (useful when leave or absence is booked by specific hours)

Requesting Leave from the Grid Calendar
With version 4.0.7, you can now request leave from the Grid Calendar. When viewing the calendar, simply click and drag across the date range you require, the leave request form will pop open with the date selection already filled in. You can then change the Leave Type on this form to switch between Holiday, Sickness, Absence or Custom Leave Types.
- Click on the initial day you would like to request and drag your cursor (whilst holding the mouse button) to the end date.

- Once the selection is made, the leave request form will appear and you can modify if required, and hit continue to complete the request.

Printing the Planner
Firefox
Click the 3 lines in the top right corner
Then click on Print. Now choose ‘Page Setup’ and then (making sure that the ‘Format & Options’ tab is selected) and tick the ‘Print Background (colours & images)’ box.


Internet Explorer
Select the cog in the top right hand corner highlight ‘Print’ and then click ‘Page Setup’

Check to see if the “Print Background Colours and Images” box is ticked, if it isn’t tick the box and then click ‘OK’

Now when you go to print the planner in LeavePlanner, you should see a screen that looks like this:
