Configuring SAML for Okta
LeavePlanner.com supports single sign-on with Okta by using SAML (only available with Enterprise Editions)
Requirements
To use Single sign-on you will need an active Okta subscription or compatible provider.
Okta Configuration
1. Logged in to Okta as an Admin user navigate to the Applications section and click Add Application

2. Then click Create new App

3. Now choose SAML 2.0 and click Create

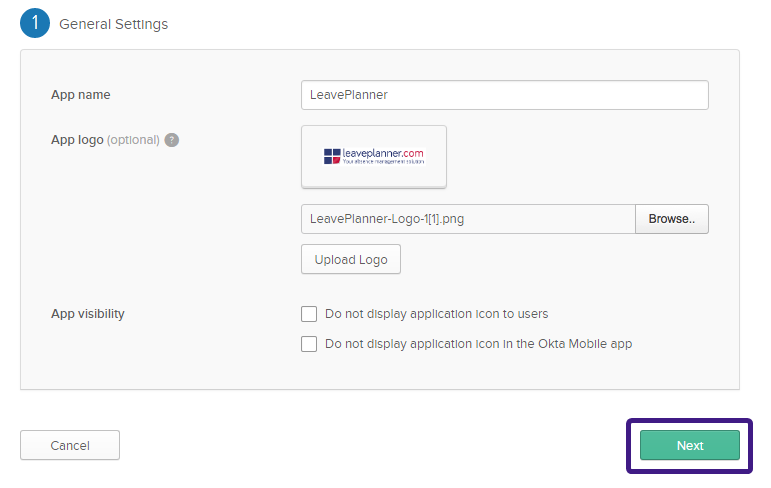
4. Name the new application LeavePlanner and optionally upload a logo before pressing Next
5. In the Single sign on URL box enter the full URL to your LeavePlanner system followed by /Account/saml.aspx.
i.e if your LeavePlanner system was running under https://secure.leaveplanner.com/ then you would enter https://secure.leaveplanner.com/account/saml.aspx here
In the Audience URI (SP Entity ID) box type https://www.leaveplanner.com/
Then press Next

6. After you have added the Application click on View Setup Instructions

7. You now need to update LeavePlanner with these settings

Update LeavePlanner
1. Log into your LeavePlanner system as the main System Administrator user and then navigate to System Settings

2. Scroll down to the SAML Integration Settings and enter the values you obtained from Okta here (copy and paste these!).

After you have enabled and configured the SAML settings and clicked Save Changes you should be able to login with Okta.
Support
Our support team is always available to answer any questions or concerns you might have. Simply open a ticket @ https://support.leaveplanner.com/ and a member of our team will get back to you.