1.3.2 – My Settings – Personal Settings – Two Factor Authentication (2FA)
Two Factor Authentication is a method of increasing the security for access to your LeavePlanner account. You can use an app on your mobile phone, e.g. Google Authenticator, to require an additional code to be entered every time you log into LeavePlanner
Use the steps below to add Two Factor Authentication to your account
- Navigate to Leave > My Settings and scroll down to the ‘Password / Personal Settings’ section
- Click on the ‘Enable 2FA’ button
- You will then see the following popup
- Use your 2FA app to either scan the barcode image, or manually enter the code in the box
- When your 2FA app successfully adds the LeavePlanner entry you need to confirm this with LeavePlanner
- Entering the 6 digit code that will be shown in the app in to the ‘Verification Code’ box and click on the ‘Verify’ button
- When this is successfully verified you will see the following message displayed. You can then click on the ‘Close’ button
- Your Personal Settings section will then update to look like the following:
Recovery Codes
Recovery codes are ‘one time use’ passwords that you can use instead of using your 2FA app. These are designed to be used in emergency situations where you need to access LeavePlanner, but do not have access to the 2FA app.
Please note – these passwords should be stored in a very secure place! We recommend storing them in a password protected file.
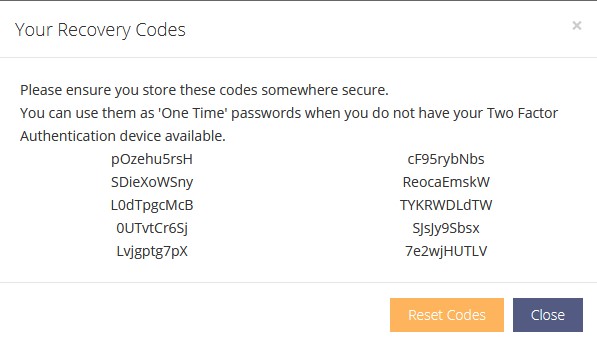
To view your recovery codes, click on the button and you will be presented with a popup like the following (your codes will be different)

If, for any reason, you suspect your codes have been compromised then click on the ‘Reset Codes’ button. This will invalidate the current codes and you will be shown a list of new codes for you to store securely again.


