3.1 – Organisation Settings
On this page you have Account Setup (Organisation Details, Leave Settings, System Access, iCAL Feeds, International Settings), Global Settings, Public Holidays (UK or custom) and Default Working Patterns.
Account Setup
On this page, you have the option to modify the following settings.
Organisation Details
- Your Organisation Name – The name of your organisation.
- Logo – Upload your company’s logo
- Licence Usage – Ensure you have enough licences for all of your users
Leave Settings
- Leave year set by – Use Organisation if everyone is reset on the same date, or Employee if you use different dates per employee.
- Leave year starts on – If you chose organisation above, enter the leave year start date.
System Access
- Password Security – Choose the default of at least 7 characters containing 1 UPPERCASE, 1 lowercase and 1 numerical or Increased level of security.
- Default Planner Access – Control who appears in your employees calendar view. This does not affect SysAdmins
- Reports – Grant managers access to the reports page.
International Settings
- Default time zone – Set the default time zone for the whole organisation
- Enable different time zones per user – Give employees the option to change their time zone in the My Settings page.
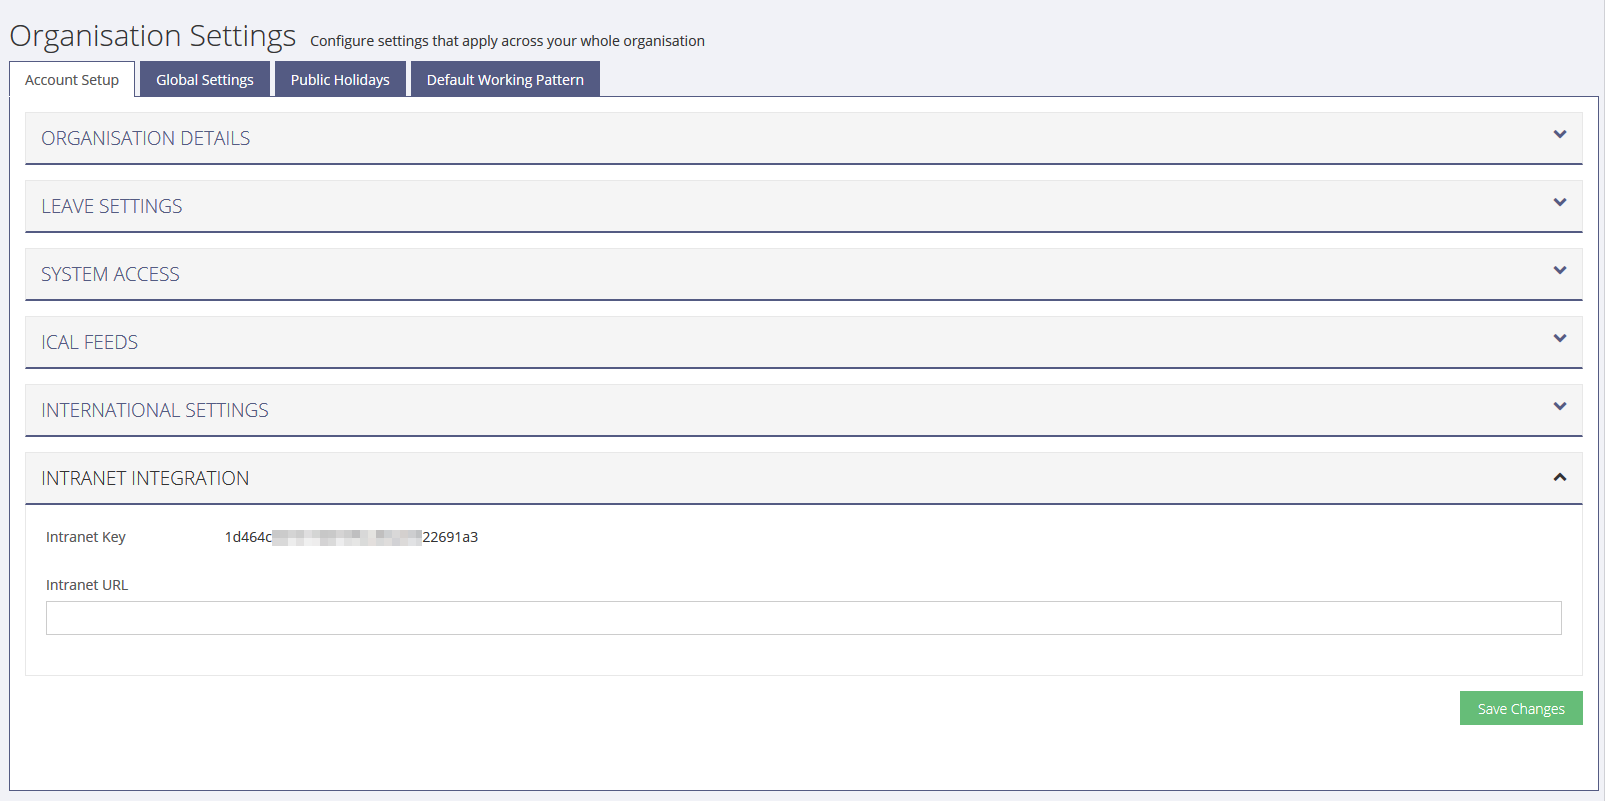
Intranet Integration
For details on how to configure your Intranet with a link to LeavePlanner – see the Configure Intranet Integration page. In this section you can find the following:
- Intranet Integration download – Download the required files if you require the link through to LeavePlanner.
- Intranet Key – Use this key to configure your Intranet link
- Intranet URL – Enter the URL of your Intranet page.
Global Settings
Here you can set restrictions on how much leave can be requested by new starters, define your default or create new working periods and combine new working periods for non standard days.
Alerting Levels
- Set how much leave can be requested by a new employee in their first month and/or first three months
- Either prevent requests being submitted or warn and allow.
Working Periods
A ‘day’ in LeavePlanner is defined as being 7.5 hours, 3.75 hours (am) and 3.75 hours (pm). Here you can modify this to the hours your organisation works and add new working periods for staff who work early or later shifts for example.
Public Holidays
Here you can choose to either use the system default (UK public holidays) or configure public holiday dates just for your organisation. To use your own public holidays, follow the steps below:
- Select Organisation and the page will load more options.
- Choose the time zone that the public holidays will use.
- Select the year that you are adding public holidays for.
- Click ‘Add a new holiday date’ to add the first day’.
- Click on the calendar icon and choose the date to fill in the field.
- Once the date is in the field, hit add to confirm and the public holiday will be added to the list above.
- When you are finished, make sure you hit the ‘Save Changes’ button to submit.
Regional Public Holidays
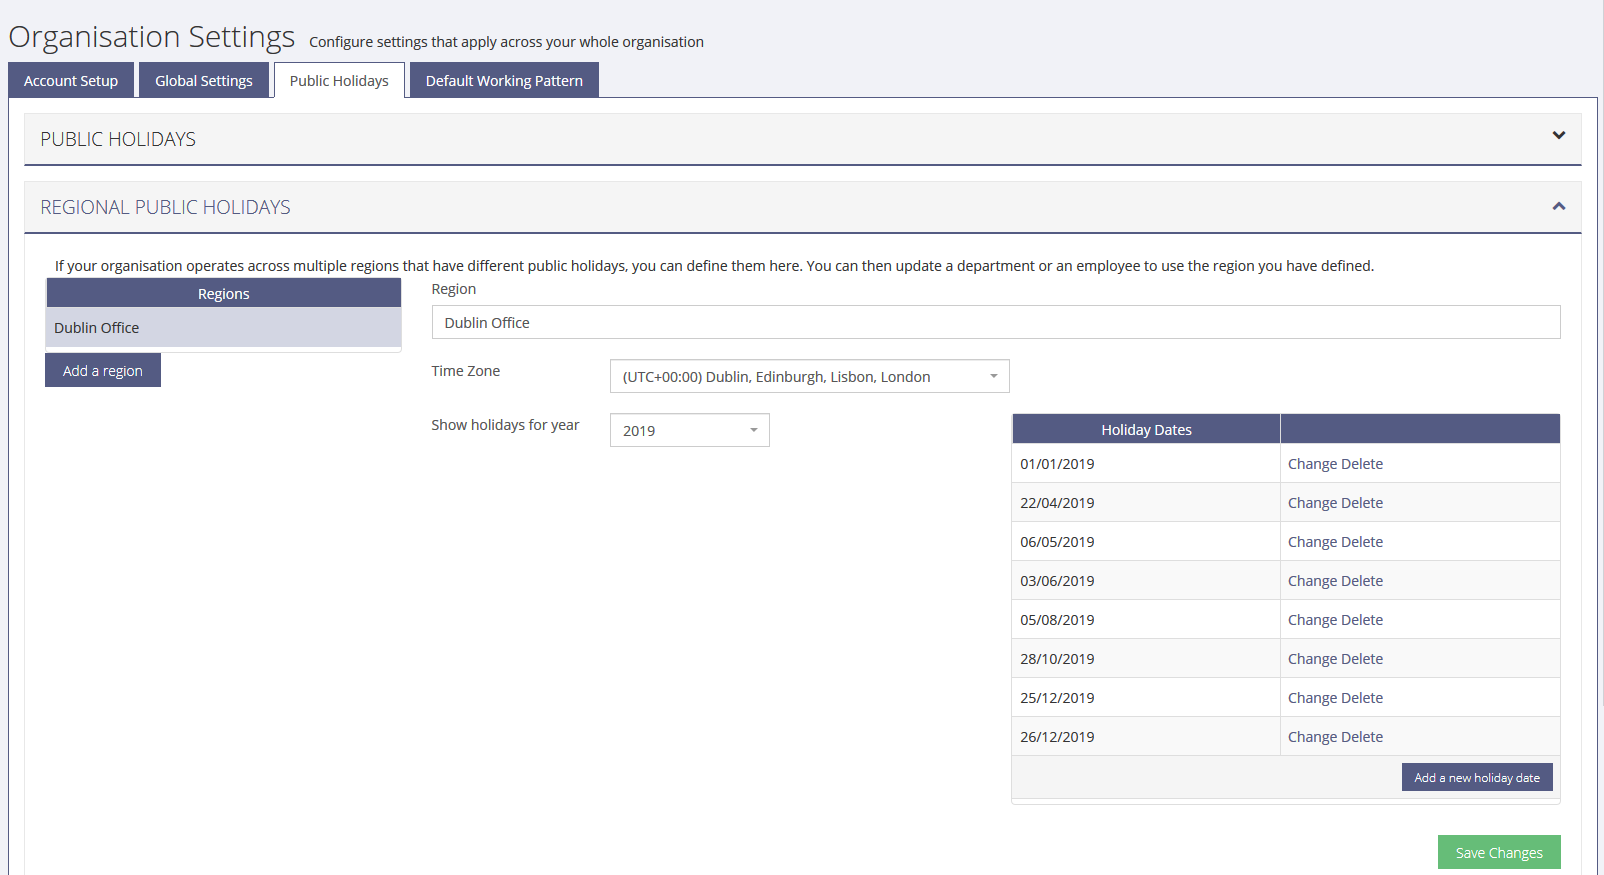
If you have multiple regions that have different time zones and public holidays, you can use the Regional Public Holidays tab to configure dates for each region. The process is below:
- First choose ‘Add a region’ and enter the region name.
- Choose the time zone that the public holidays will use.
- Select the year that you are adding public holidays for.
- Click ‘Add a new holiday date’ to add the first day’.
- Click on the calendar icon and choose the date to fill in the field.
- Once the date is in the field, hit add to confirm and the public holiday will be added to the list above.
- When you are finished, make sure you hit the ‘Save Changes’ button to submit.
To edit an existing Region, click on the region on the left-hand side and then you can modify the name, time zone or dates. Choose the ‘Save Changes’ button to submit your changes or ‘Delete Region’ to delete it completely.


